After floodwaters have receded, damage to your building envelope can need clean-up and repair. Now is also the time to evaluate your interior components for restoration or replacement.
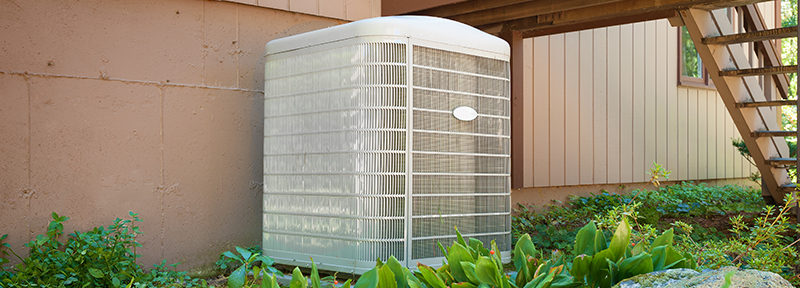
HVAC systems may need a complete overhaul, since floodwaters can not only corrode the physical mechanisms but also provide a breeding ground for microorganisms such as bacteria and fungi, according to the CDC. This contamination can occur in sections that were submerged and in air supply ducts above the waterline. This makes the disinfection of all components essential. Also, hurricane-force winds and the power of rushing water (and the debris it carries) can cause damage to the fins and exterior of the unit, while power surges – which are common during hurricanes – can adversely affect the system’s capacitator, compressor, wiring, and fuses. (https://www.hvac.com/blog/disaster-assistance-for-your-hvac-system/)
While contractors work to ensure that, once repairs are completed, the HVAC system creates a healthy indoor environment, it’s equally important that they recognize the psychological impact felt by those affected by the storm. As noted in our post, The HVAC Contractor’s Role in Disaster Recovery, HVAC contractors and technicians provide not only technical expertise but also recommendations regarding the repair-or-replace decision—advice that can be most welcome given the myriad of decisions and challenges their customers are facing in the aftermath of the disaster.
Step 1: Take adequate precautions.
Turn off the system. If areas of the building will be occupied during repairs, use temporary walls, plastic sheeting or other vapor-retarding barriers and maintain negative pressure (relative to adjacent non-construction areas) to prevent contamination from transferring to other areas or throughout the building.
Workers should wear at least an N-95 NIOSH-approved respirator to protect against airborne microorganisms and if the area is poorly ventilated, use appropriate chemical cartridges in addition to the particulate filters to guard against inhalation of chemical vapors. Auxiliary fans can also help supply clean air to the work area.
Step 2: Remove flood-contaminated materials from the system.
Any insulation in the vicinity of HVAC system components – and HVAC filter media that has been contaminated by floodwaters – must be removed and disposed of according to applicable Federal, State, and local regulations. If any HVAC system components are also contaminated and can’t be effectively cleaned and disinfected, discard and replace with new components.
AHRI recommends that duct insulation that has been in contact with floodwater is replaced since it is impossible to decontaminate. The ductwork itself should be thoroughly cleaned, dried and disinfected.
Check for any physical damage to the system (indoor and outdoor units) and to refrigerant or gas lines, electric wiring and any other connections. If either the indoor or outdoor unit of the HVAC system needs to be replaced and is rated less than 13 SEER, both parts must be replaced, according to the Air-Conditioning, Heating, and Refrigeration Institute (AHRI). Improperly matched indoor and outdoor units can increase the risk of premature failure while reducing efficiency.
Step 3: Clean and disinfect component surfaces.
Use a HEPA-filtered vacuum cleaner to remove dirt, debris, and microorganisms to clean the surfaces, including filter racks, drain pans, bends and horizontal sections of air ducts where debris can collect. Remove and service (clean, disinfect, dry thoroughly and test) the HVAC system fan and then re-install. For heavily contaminated components, use a steam or a high-pressure washer. Gasoline-powered pressure washers should be used outside away from air intakes to prevent carbon monoxide hazards.
Then disinfect with a bleach solution (1 cup of household chlorine bleach to one gallon of water), followed by a clean water rinse.
Step 4: Replace the insulation.
Once the HVAC system components are cleaned and/or replaced as needed, replace the insulation. According to the CDC, using an external (i.e., not in the air stream) smooth-surfaced insulation will help prevent debris and microorganisms from collecting in the future while upgrading to the highest efficiency filters practical is the most cost-effective way to improve the long-term quality of the indoor environment.
Step 5: Test the HVAC system and regularly check performance and condition.
Verify that all electrical components are working properly and that the HVAC system performance conforms to the recommendations in ASHRAE Standard 62.1-2016, Ventilation for Acceptable Indoor Air Quality or Standard 62.2-2016, Ventilation and Acceptable Indoor Air Quality in Low-Rise Residential Buildings. Operate the system continuously at a comfortable temperature for 48 to 72 hours, checking for objectionable flood-related odors. If present, continue the flush-out process until odors are gone, then replace the HVAC filters with new ones prior to building occupancy.
Arrange for frequent inspections of the system, inspecting the HVAC system filters each time and replacing it as necessary, gradually extending the time between checks until it follows the routine operation and maintenance specifications that system.
Additional information is available from the following sources:
- Institute of Inspection, Cleaning and Restoration Certification (IICRC) — Standard and Reference Guide for Professional Mold Remediation (IICRC S520)
- National Air Duct Cleaners Association (NADCA) — Assessment, Cleaning and Restoration of HVAC Systems (ACR 2013)

