What’s New with Regs: Regulatory Edition – American Innovation and Manufacturing Act (AIM Act)

On this episode, we are joined again by Dr. Rajan Rajendran and Jennifer Butsch, Copeland’s regulatory experts. This episode of What’s New with Regs walks through the recently approved American Innovation and Manufacturing Act (AIM Act). We discuss what the AIM Act is, what it means moving forward as well as how it is different from the Kigali Amendment. We also make a point to touch on the concept of sector base rulemaking, how the EPA might view this topic and the AIM act’s impact to low GWP Refrigerants.

Host: Lindsay Headings, Digital Marketing and Content Manager, Copeland
Co-host: Jennifer Butsch, Director of Regulatory Affairs, Copeland
Guest: Dr. Rajan Rajendran, Vice President of Systems Innovation Center and Sustainability, Copeland

Timestamps:

  • 0:09 – Welcome
  • 1:03 – Introduction on AIM Act and what it is
  • 1:29 – What does the AIM Act signify?
  • 3:11 – Reason why AIM Act is called the American Innovation and Manufacturing Act
  • 4:20 – How is AIM Act different from Kigali Amendment?
  • 8:28 – Sector based rulemaking and how EPA might rule that out?
  • 10:32 – GWP Refrigerants

For additional information on the AIM Act check out our E360 webinar and regulations webpage:


Previous Episode: What’s New with Regs: System Efficiency – A Look into the Future

Texas 2021: Best Practices for Unexpected Weather Changes

As we’ve seen, the weather in Texas, as well as other places across the country, can change rather unexpectedly. The 2021 storm that brought brutal temperatures and icy conditions to the Lone Star State has caused millions of residents to be without power in freezing conditions. These low temperatures and lack of heating has also produced numerous plumbing issues with water damage in ceilings, walls, and floors due to frozen or burst water pipes.

To better prepare for rapid changes in the weather conditions, here are some quick tips to help prevent your pipes from freezing:

  • Let cold faucets drip in every sink and bathtub to allow a constant flow of water because running water does not freeze.
  • Don’t turn off your heat to avoid uninsulated areas around your pipes to get cold or freeze. Seal any gaps around water pipes using foam insulation wraps or electrical heat tape to ensure more insulation.
  • Open the cabinets in your kitchen and bathroom to expose those pipes to your home’s indoor heating. By doing so, you can provide some warm air to circulate around the pipes.
  • If a frozen pipe is exposed and visible but hasn’t burst yet, you can try to thaw them using a space heater or blow dryer if power is available. Be sure to not use anything flammable to avoid the risk of a fire.

The HVAC system in your home is one of the most important elements controlling and maintaining your indoor temperature. With storms and temperature changes, it is unlikely that your HVAC will malfunction. However, problems can emerge after a winter storm.

The following can help troubleshoot some of the problems that could arise with your HVAC:

  1. The outdoor condenser coil could get dirty or clogged from ice and snow causing reduced airflow. This forces your HVAC System to work harder leading to increased energy costs. A blocked indoor air filter or outdoor condenser coil could potentially damage the entire system.
    • Solution: Regular maintenance and periodic inspections of both the outdoor unit and indoor unit, especially before the heating season, by an HVAC technician.
    • Regularly change the indoor air filter. See manufacturer guidelines for your area.
  2. Investing in a smart thermostat for your HVAC system can reduce the chances of it malfunctioning. Since thermostats control the temperature and airflow an HVAC system should produce, it is necessary to have an efficient thermostat that would not break down.

By following these quick tips, you can be sure to better prepared in the future for extreme changes in winter weather to safeguard your home and equipment.


Read Next: 5 Steps to Prevent Frozen Pipes

Frozen pipes

Pros & Cons of Home Warranties

For new construction, a recent purchase or maintaining an older house, homeowners can purchase a home warranty at any time for any home. Providing peace of mind, as well as helping protect and maintain household budgets, home warranties can make a big difference for you and your family, but you may still need more information regarding what these types of guarantees are and what is covered, the benefits and issues you may encounter, and what questions should be asked prior to signing a contract.

What is a home warranty and how is it different than home insurance?

A common misconception is that homeowner’s insurance is the same as a home warranty. Major damages such as fires, hail, and property crimes that could affect one’s personal home or possessions are covered by homeowner’s insurance. In contrast, a home warranty places a contract between a homeowner and a home warranty company. This contract gives the homeowner benefits of discounted repair and replacement services on appliances, including electrical, air conditioning, ductwork, water heaters, washers, dryers, refrigerators, and dishwashers.

If you do not have a home warranty you can go directly to a contractor of your choice for services. On the other hand, home warranty companies have contracts with certain approved service providers. Because of this, when something breaks down, the homeowner calls the home warranty company who then sends one of their approved providers to come and inspect the problem. In this situation, the home warranty company is essentially the liaison between the customer and the service provider.

The Cost:

Home warranties normally cost hundreds of dollars a year and can either be paid upfront or in installments depending on the home warranty company you choose.

  • Apart from a new house, the property’s age does not influence the cost of the home warranty. If it is a new home, the homeowner will have a builder’s warranty which covers major structural elements of a new house from physical damage and a manufacturer’s warranty for new appliances. Windows, tiles, and distribution systems such as electrical and plumbing will also be covered. For new appliances, the manufacturer’s warranty typically lasts for the first 12 months and can be extended with an extended warranty if one chooses to. New house homeowners should read their builder’s and manufacturer’s warranties to see what it covers and what it doesn’t.
  • If your house is less than 5,000 square feet, the price will not be affected in most cases.
  • Within a basic policy, guesthouses will not be covered. However, with an additional fee, it can be covered or a separate contract.
  • A normal home warranty can typically cost between $350 – $600 per year with about $50 – $100 for each repair or service visit (prices dependent upon warranty company and location in the country).

A home warranty is not a 100% solution to all your home repairs. In few instances, some repairs will not be covered by the home warranty company because it is not in the contract or they don’t offer coverage for that repair. It is vital for the homeowner to know what is being covered in their contract and spend additional money on coverages that are deemed important. There are various levels of contracts that can be purchased. Make sure you understand which you are purchasing.

Pros:

  • If you prefer not to worry about finding a contractor when you have a problem, warranties may be the best option since they have preferred contractors for you to use.
  • A home warranty is for homeowners who are not well versed in their home’s systems and appliances, how properly it has been maintained, and how well it was built. One can just call the home warranty company, and a contractor will evaluate the damage and fix it. There is no need to do research to find different parts and make sure if they will be compatible.
  • Another great benefit to home warranties is their flat rates. When a repair needs to be made, sometimes it can cost the homeowner hundreds or even thousands of dollars if the burden was on them to fix it. However: with a home warranty plan, this is not an issue. A repair that could cost hundreds or thousands can be fixed by the fixed rate decided in the contract, even though it is lower than the repair cost. This could mean big savings on major repairs. Ask your warranty company about deductibles. Choosing a high deductible on your warranty will yield a lower annual fee.
  • In the case you sell your home, most home warranties can be easily transferred to the next homeowner. Make sure your contract states that the home warranty is transferrable.

Cons:

  • Home warranties normally do not have the best quality or satisfaction rate. Warranty contracts may state that they will replace the unit with the same features. This can leave the door open to variances of brand and color. An air conditioner in a distinct color may not be an issue, but a stove or refrigerator in a different color could be upsetting. In addition, if you prefer a certain model or brand for replacement parts, your preference is not always satisfied. Essentially, you have less control over what type of replacement is used.
  • Certain repairs can be denied due to specific guidelines of the warranty. For example, mini-split AC systems are not covered by most home warranties. Most home warranties will only cover the primary kitchen refrigerator. In addition, in some warranty plans, window AC units are not covered. With regard to the outdoor AC condensing unit, there is no guarantee that your equipment will be repaired with the Original Equipment Manufacturer (OEM) designed/specified components. The contract states it could be replaced with a “like” component that may not be qualified or specified by the component manufacturer or the Original Equipment Manufacturer (OEM). Many home warranty companies may buy a surplus of rebuilt compressors (which may not be certified under UL requirements) to get a better price on replacement components. (Buyer beware)
  • At times, home warranties can become expensive. According to Investopedia, it may make more sense to put payments into an emergency fund to use for any repairs that come up.

Here are a few questions one should ask the home warranty company to better understand their coverages and contract:

  • Is the compressor replacement in my HVAC system factory authorized by my system manufacturer? Is it UL recognized?
  • What is covered and not covered by the specific home warranty?
  • Can you tell me more about the deductibles?
  • What kind of service calls are covered?
  • Can I choose my own contractor?
  • Is there a limit to the number of repairs in my contract?
  • Are multiple systems and appliances covered?
  • Do you offer discounts for multiple-year coverage?
  • What is the process if I have a claim?
  • Does it matter if my home systems and appliances are old?
  • What if my service claim is denied?
  • What is the length of my contract?
  • What if I’m not satisfied with the contractor that was chosen by a home warranty company?
  • When do you authorize full system replacement versus component changeouts?

Overall, when selecting a home warranty plan, it is important to understand what the contract covers and look for any small-print conditions within the contract.

Tell us of any experience(s) with home warranty programs you may have encountered. Let us know what you think of this article below and if there any other topics you would like us to cover!


Read Next: Busting Myths on Home Warranty

home warranty

2023 Federal Minimum Standards: Homeowner’s Perspective

One of the most common questions we are asked is, “As a homeowner, what should I know before purchasing my next central air conditioner?”. Understanding the system efficiency ratings can help you make the most informed decision for this major purchase.

Quite simply, more efficient equipment uses less energy to perform the same amount of cooling, but these systems also typically cost more to purchase. However, your air conditioner is usually the most energy-using appliance in the home, so a more efficient system could save you more in utility cost savings than the added upfront purchase cost for the AC system. In addition, using less power and energy is better for the environment because less coal/natural gas is used in electric production and it reduces greenhouse gas emissions. New regulations will require AC systems to be more efficient beginning January 1, 2023.

Who sets the new standards and why?

Before we jump into the changes that will happen, it is crucial to know why these revisions take place. The U.S. Department of Energy (DOE) has the authority to set and revise new minimum energy standards for certain equipment, including central air conditioners, if there are improved technologies available that save energy and are cost-effective (EIA). Equipment is evaluated every six years. The last efficiency increase for air conditioners took effect in 2015. The DOE lists several consumer benefits with the most significant being a large reduction in energy bill spending. Since 1990 air conditioners have reduced energy usage by approximately 50%. (DOE)

How is efficiency measured?

Efficiency for air conditioning is measured by SEER. SEER stands for Seasonal Energy Efficiency Ratio. It is the ratio of the cooling output during an annual cooling season divided by the total electrical energy used. As a result, a higher SEER rating means lower electrical usage for the same amount of cooling.

What does this mean for me, do I need to upgrade my existing air conditioner?

If you are a homeowner, there is no need to panic. You can continue to use your existing AC unit if it is still functional and already installed. The new regulations and requirements only apply to new AC units that are purchased after 2023.

What should I ask my contractor in 2023?

When installing new units, make sure to work with a licensed contractor and ask what efficiency level they recommend for your region and desired comfort level. Higher SEER products often have additional benefits like tighter temperature control, better dehumidification, and more features in addition to energy savings. It is also recommended to clarify what is included in the quote for replacement, as installed performance is affected by several other factors external to the equipment design. Some conditions that could negatively impact HVAC performance include:

  • Improperly matched systems (mismatch in indoor coil, outdoor condensing unit, etc.)
  • Improper system installation
  • Dirty coils
  • Thermostat or control system location or settings
  • Undersized or leaking ductwork
  • Inadequate level of insulation and non-insulated construction methods
  • Leaking or drafty windows and doors
  • Dirty or improperly installed air filters

The next time you look to purchase a new air conditioner, consider using the ACCA Residential Quality HVAC Installation Checklist to make sure you are receiving the performance benefits you paid for.


Read Next: Replacing Your Central Air Conditioner?

Couple happily reviews electricity bills that lowered since they replaced their HVAC system

How Your Air Conditioner Works

Originally published on November 12, 2012

Understanding AC Systems: A Behind-the-Scenes Look

While most people associate air conditioning with cold, the science behind making your home cooler actually deals with the transfer of heat. When that heat is lost, or removed, the remaining cold air cools your home.  In order to understand this system better, let’s look at the major components. Your central air conditioning system has two key components: the indoor unit, and the outdoor unit. They work in tandem to keep your home comfortable year-round.

Indoor Unit

The indoor unit is typically located in a closet or basement, and is near where your furnace filter is located. The unit consists of a coil box that contains what is called an evaporator.  The evaporator allows for the refrigerant – a cooling fluid inside the coil piping sometimes known by a brand name such as Freon™ – to evaporate and absorb heat. Once the heat is absorbed from inside your home, it leaves nothing but cool air to be sent back into your home.

Just as water absorbs heat from your stove in order to boil (or evaporate) refrigerant absorbs heat from your house. This means that both water and refrigerant turn from liquid to vapor as they absorb heat.

Outdoor Unit

The outdoor unit is usually located in the rear or side of your house and it is where the heat from inside your home is dispersed. It contains the compressor, condenser coil and a fan. The heat absorbed from your home’s air is transferred to the refrigerant and then pumped to the outdoor unit. As this heat is absorbed and moved by the refrigerant to the outdoor coil, it passes through the compressor.

The compressor in your air conditioning system has the primary job of moving the refrigerant throughout the system. This is important as we can then keep reusing the refrigerant to cool our house. The refrigerant is compressed to a higher pressure, and moved through the outdoor coil known as the condenser. As the refrigerant passes through the condenser, a fan delivers ambient air across the condenser coil causing it to cool.

As the process completes, the heat from inside your house is dispersed to the air outside your house. The refrigerant is then pumped back indoors and the whole process repeats.

Did you know that making your home cooler was actually less about increasing cold air and more about removing existing heat?

How an Air Conditioner Works

How an Air Conditioner Works

How a Heat Pump Air Conditioner Works

How a Heat Pump Air Conditioner Works

How a Geothermal Air Conditioner Works

How a Geothermal Air Conditioner Works

How a Geothermal Heat Pump Air Conditioner Works

How a Geothermal Heat Pump Air Conditioner Works

Related Articles
Simple Ways to Extend the Life of Your AC and Heating System

How to Finance Your New HVAC System

>Originally published on May 29, 2018

HVAC Financing Tips for Homeowners

HVAC financing can be challenging for anyone, especially a new homeowner. The cost to install a new HVAC system can vary based on:

  • The type of equipment being installed (e.g. single-stage, two-stage, multi-stage, variable speed, geothermal);
  • The existing equipment (e.g. ductwork, outdoor piping);
  • And the type of install (e.g. new install vs. retrofit, ease of installation).

For most people, HVAC financing is a large expense, and paying out of pocket isn’t feasible. But there are plenty of options to finance the HVAC system that is right for you.

Home Equity

Borrowing against the equity in your home can often be a good way to finance home improvements. This option has less interest and is tax-deductible, but there are risks. Falling behind on your payment could cost you not only your HVAC system but your home.

Private Lenders

You can also borrow from private lenders, such as banks or credit unions. The interest rates and max amounts available to borrow will vary, but many banks have low-interest rates for these types of loans.

Loan Programs

There are loan programs, such as the Federal Housing Administration’s (FHA) PowerSaver Loan Program, that allow you to borrow up to $7,500 without putting up your home as collateral. However, you must have home equity to participate.

Credit Card Companies

Talk to your credit card company about charging this large of a purchase to your card. Know that there is a possibility of higher interest rates.

Utility Companies

Utility companies can also help by charging monthly payments for your new HVAC system on your electric bill. They often provide low-interest rates if you choose energy-efficient systems.

Need More Information?

DSIRE is an excellent source to learn more about policies and incentives that support energy-efficient systems and renewable energy. To find information that is applicable to your location, visit www.dsireusa.org.

Checking The Charge On A Heat Pump In The Winter

checking heatpump charge


When you ask many people nowadays how to check the charge on a heat pump during low outdoor temps they will say that you need to “weigh in and weigh out” the charge. While this may be an effective method, it isn’t always practical.

Now… If you are making a refrigerant circuit repair, weighing out and weighing in makes perfect sense, especially since micro channel condensers and scroll compressors make pumping down less viable anyway. But there are many cases where you just need to check the charge to make sure the system is working properly and in these cases, weighing in and out would be plain silly.

Step #1 – If there is any frost on the outside unit, get it completely defrosted first.

Step #2 – Check all the obvious things first, filter, coils, blower wheel etc… If the unit isn’t clean, it will be really hard to check.

When charging in heat mode, read manufacturer specifications first. Lennox, for example, gives specific instructions for charging their units in below 65˚ outdoor ambient conditions. It involves blocking off the condenser coil with cardboard (or even better using a charging jacket) while continuing to run the system in cool mode. You can learn more about raising head pressure and setting an optimal sub cooling level by reading 5 Ways to Increase the Efficiency of Your Home Heat Pump System.

Remember that in heat mode on a heat pump the evaporator is outside, and the condenser is inside. This is important because in cool mode a dirty air filter caused low airflow on the evaporator. This would typically cause a low suction pressure, and a low superheat. In heat mode, a dirty air filter causes low airflow across the condenser. This can cause extremely high head pressure. In heat mode, a dirty outdoor coil can cause a low suction pressure.

heating check chart

As an example, Trane includes a pressure curve chart with many heat pump condensing units. Be sure to use the scale all the way to the right that says heat mode. Indoor and outdoor dry bulb temperatures are necessary to use the Trane pressure curve. Carrier supplies many heat pump condensing units with a pressure guideline chart. Carrier only wants the heat mode pressure chart used as a guideline, not as a charging tool. Always reference manufacturer guidelines before setting any charge. For an engaging and educational infographic on how a heat pump works, explore a visual representation that simplifies the complex mechanisms involved.

100˚ Over Ambient Rule of Thumb
Even though manufacturer specifications should be followed, there are some basic guidelines that will aid in charging and diagnosis in a pinch. The most widely quoted rule of thumb is the 100˚ – 110˚ over ambient discharge rule. This guideline states that a properly charged unit will have a discharge line temperature of 100˚ – 110˚ above the outdoor temperature. If the discharge line is too hot, add refrigerant (If the charge is the issue and not another problem). If the discharge line is too cool, remove refrigerant (again only if the charge is diagnosed as the issue).

Keep in mind that this rule only works if you are close to being in the correct zone. For example, an extremely overcharged system with an outdoor TXV can actually show a high discharge temperature. It’s just a rule of thumb and you shouldn’t rely too heavily on it.

Checking the Unit in Heat Mode

Checking the Unit in Heat Mode

To give a simple example using the 100˚ – 110˚ over ambient rule. If it were 60˚ outside you could say by the 100˚ – 110˚over ambient rule, the charge is about correct. If it were 30˚ outside the 100˚ – 110˚ over ambient rule would show undercharge (or other conditions that can cause high discharge line temp see this article). If for example the discharge temperature were 210˚ with a 150 P.S.I. head pressure and a 10 P.S.I. suction with a 50˚ outdoor temperature; this would show an extreme undercharge. Subcool and superheat can still be checked in heat mode, the problem is since there are rarely any set guidelines, it is difficult to tell when the charge is set correctly by simply checking subcool or superheat alone. Generally, you will see normal superheat (8-14) on a system with heat mode TXV and the subcooling will generally be a bit higher than usual, especially when measured outside.

Suction Pressure / EVAP DTD Rule of Thumb
Another common old school rule of thumb is suction pressure should be close to the outdoor temperature in an R22 system. However, this rule of thumb (obviously) does not work on an R-410A system. A more applicable guideline is 20˚-25˚ suction saturation below outdoor ambient. This means if it is 50˚ outside the suction saturation temperature should be between 25˚and 30˚ (on most systems).

Head Pressure / CTOA Rule of Thumb
Because the evaporator coil is substantially smaller than the condenser you will usually see higher head pressure (condensing temperature) in relationship to the condensing air, in this case, the indoor air. This can vary a lot depending on the age / SEER of the unit, the size of the coil, and how the indoor airflow is setup but generally will be 30˚ – 40˚ condensing temperature over the indoor dry bulb.

Checking Without Gauges
Here are some quick tests you can do on a heat pump to confirm it is operating close to specs without using gauges when the coil is frost-free and the outdoor temps are 65˚ – 15˚.

  • Check the discharge (vapor) line, it should be 100˚ – 110˚ over the outdoor ambient temperature
  • Suction line Temp should be 5˚ – 15˚ cooler than the outdoor temperature
  • Liquid Line should be 3˚ – 15˚ warmer than the indoor temperature
  • Delta T indoors will vary greatly depending on the outdoor temperature.

If anything looks off, go ahead and connect gauges to verify further…. and like I said several times already, follow manufacturers’ guidelines.

The best way is to verify total system capacity (with heat strips off) using dual in duct thermometers and manufacturer specs but I understand how challenging it can be to ACCURATELY verify system airflow so it likely won’t always be your first move.


Read Next: Infographic: How a Heat Pump Air Conditioner Works

How heat pumps work

BBB Tips for Hiring a Heating Contractor

This post is an article from the Better Business Bureau serving Dayton/Miami Valley, Inc.
To find your nearest Better Business Bureau office, click here.


The weather is starting to get cooler and your furnace might need to be inspected or updated. Buying an HVAC system is one of the biggest expenses for a homeowner. There are three components to think about when buying one: initial price, operation costs, and cost of repairs and maintenance.

Now that most people are working from home during the COVID-19 pandemic, HVAC systems are working harder than ever. And, it’s always a good time to inspect your system before turning it on the first time. Therefore, heating contractors are in high demand. Don’t be surprised if a contractor can’t get to you right away.

Finding the right heating contractor can be hard. Here are some tips from the Better Business Bureau to make the process less stressful:

  • Do your research. Know the ins and outs of the different types of units you can get. Some questions to ask: Will it do the job? Will it meet your needs now and in ten years? What’s the repair history? And, will it fit your budget? Look for energy star products that offer long-term savings on energy costs.
  • Find the right company. Find one that sells the type of unit you’re considering. Make sure the contractor is properly licensed, bonded, and insured.
  • Get recommendations from family and friends.
  • Get references from companies. Contact each and ask about the service received.
  • Compare prices and services. Get written quotes from all the companies you’re considering. Avoid contractors offering a price without looking at your current system. Consider each companies’ repair, maintenance, or replacement costs. Quotes should explain the service to be provided and materials to be used. Don’t pay everything upfront. Work out a payment schedule and don’t pay in full until the job is done to your satisfaction.
  • Understand the follow-up. See if there is a free call back for any problems you may have after your new unit has been installed. Is a service contract offered which provides a once-a-year service to make sure your system is still running properly?
  • Review the warranty. Make sure you understand what the conditions are. Look at your old warranty to see if repairs and replacements are covered.

For more information about hiring a heating contractor, visit bbb.org or call (800) 776-5301. BBB can provide a list of BBB Accredited Businesses in the industry. You can also check out contractors Business Profiles, which feature the company’s complaint history, share verified customer reviews, tell if it’s BBB Accredited or not, and much more.


Read Next: Why Selecting a Contractor With ACCA and NATE Accreditation Is Important

HVAC Contractor Selection

Overcoming the Challenges of Wintertime Humidity and Fireplace Use

During the winter, your home’s interior comfort and energy bills can be greatly affected by relative humidity and fireplace use. Learn about the challenges posed by both and how to overcome the issues created by each..

Humidity

The term relative humidity (or RH) refers to the percentage of water vapor present in the air at a given temperature. For example, at 50 percent RH, the air is holding half of the moisture it’s capable of holding. The air’s capacity to hold water decreases as the temperature goes down and increases as the temperature goes up.

On a cold winter day, the weatherman may report that the outside temperature is 10°F with 70 percent humidity. When the cold outdoor air infiltrates a home and is heated to 72°F (22°C), it expands to four or five times its previous size. While the amount of moisture remains the same, the amount of humidity relative to the air volume (the RH) is reduced.

For example, when the outdoor temperature is 10°F (-12°C) and outdoor relative humidity is 70 percent, a home heated to 72°F (22°C) has an indoor humidity level of only 6 percent — much drier than the 25 percent relative humidity of the Sahara Desert!

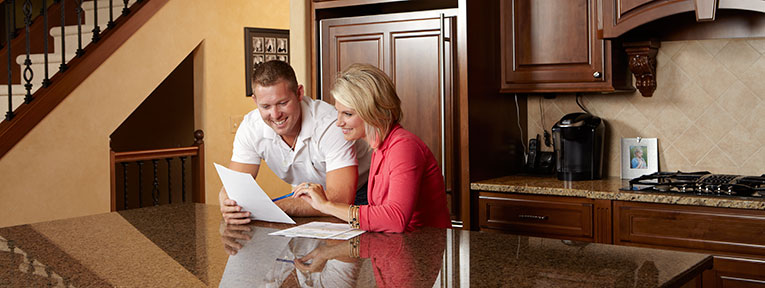
The dry interior air will steal moisture from wherever it can find it, including your body! As moisture evaporates from your skin, you feel cooler. To counteract this sensation, it’s likely that you keep your thermostat turned up—an expensive habit, given the high cost of heating these days.

However, maintaining indoor relative humidity in the healthier more comfortable 35-to-45 percent range minimizes the air’s need to replenish moisture, and little or no evaporation from your body takes place. As a result, you can turn your thermostat down about 3 degrees and still maintain your former level of comfort and warmth. The energy cost savings over an entire heating season—let alone over multiple heating seasons—will be significant. According to the Department of Energy an average home spends approximately $600 for heating. Reducing the temperature by 3 degrees can save you 15 percent or $90 per year.

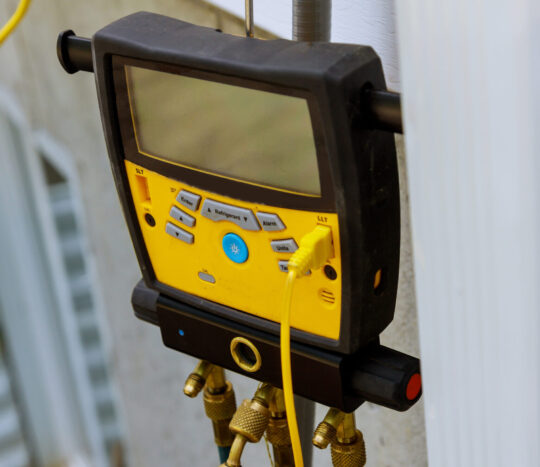
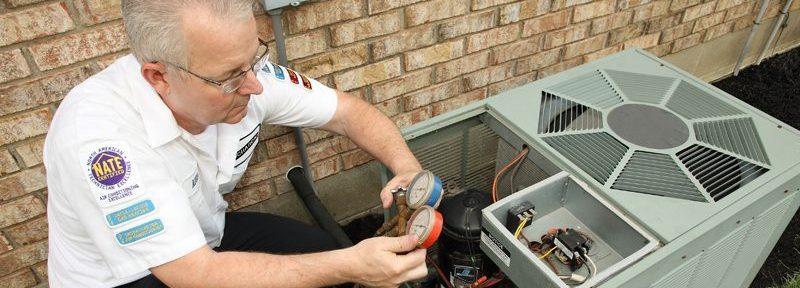
There are many ways to humidify the air in your home. You can use a simple single room humidifier, to installing a whole-house humidifier in your HVAC system. Typically, a whole-house humidifier can cost approximately $300 for a flow-thru type to over $600 for a steam type humidification. To control the humidity level in a home it is recommended to use a more accurate digital thermostat with humidity control for your HVAC system.
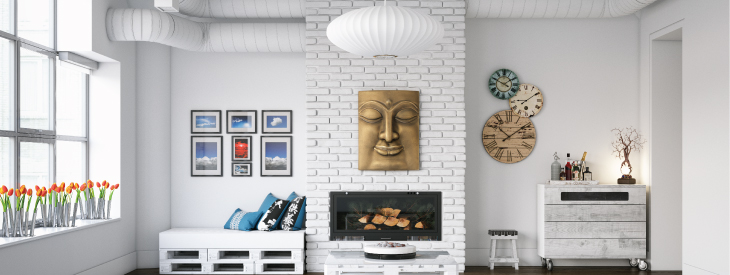
Fireplaces

Over 100 million homes, in North America are constructed with wood or gas-burning fireplaces. Unfortunately, there are negative side effects that the fireplace brings to a home, especially during the winter heating season.

Researchers have studied the amount of heat loss through a fireplace, and the results are amazing. One research study showed that an open damper on an unused fireplace in a well-insulated house can raise overall heating-energy consumption by up to 30 percent. According to the Department of Energy an average home spends approximately $600 for heating. Increasing energy usage by 30% increases your energy bill by $180 per year.

Testing conducted by a major laboratory revealed that between 80 percent and 90 percent of the heat produced by wood burned in an open fireplace is lost up the chimney. This means that for every $100 you spend for firewood, you get only $10 to $20 worth of heat. The rest goes up the chimney.

An open fireplace draws much more air than needed for combustion. As the large volume of air is drawn up the chimney, warm air from other areas of your house goes up the chimney, too. This steals heat from the other rooms and pulls cold air into the home through cracks around windows and doors and other leaky places that cannot be completely sealed off.

According to the U.S. Department of Energy, conventional fireplaces are one of the most inefficient heat sources, exhausting as much as 24,000 cubic feet of air per hour to the outside. All that warm air lost up the chimney must be replaced by cold air brought from outside and then reheated by the furnace.

Field trials conducted by the Combustion and Carbonization Research Laboratory (CCRL) of fireplaces in Canadian homes, in conjunction with other combustion equipment, have shown that in all but one case, on cold winter days, use of conventional masonry fireplaces actually resulted in an increase in fossil-fuel consumption for heating. The fireplaces actually had negative energy efficiency during the tests.

Why does a home with a fireplace have higher energy bills? Your chimney is an opening that leads directly outdoors — just like an open window. Even if the damper is shut, it is not airtight. An open or poorly sealed damper can draw air up the chimney even when the fireplace is not in use. This can occur during both heating and cooling seasons, creating a net energy loss on an annual basis.

So, how can you overcome inefficient fireplaces? An approximate 10-time improvement in heating efficiency can be made by installing an insulated fireplace insert. For standard fireplaces, adding a chimney cap damper to close the top of the chimney greatly reduces the amount of air that is able to enter the flue and draft into your home. Burning the right type of wood can help fires to burn hotter and longer, so only use seasoned firewood or hardwood logs to improve heating efficiency. Also, build ups of soot, even as little as 1/10 of an inch, on your flue can reduce the heat transfer of your fireplace by up to 50%. A professional chimney cleaning helps remedy this issue along with maintaining a good airflow in the flue for better burning fires.

By understanding the challenges that humidity and fireplaces can pose during the winter months, small adjustments to your HVAC system and fireplace efficiency can make a positive impact on the comfort and energy use in your home.


Read Next: Is Your Fireplace Burning Through your Energy Bill?

Tech Experts Edition: Tandems and Trios

This podcast episode is all about tandems, trios and nomenclature! Lindsay, John, and James decode a common compressor nomenclature and explain the difference between even and uneven tandems. We also provide various marketing bulletins based on tandem/single compressor replacements, run cycle, staging, and oil balancing.

Host: Lindsay Headings – Digital Marketing and Content Manager, Emerson
Co-Hosts:

  • James Stevenson – Technical Service Engineer, Emerson
  • John Roberts – Technical Service Engineer, Emerson

Timestamps:


This episode’s question of the week is now CLOSED. Our lucky winner is Gary Rosier. Congrats Gary!

Next Episode: The New Copeland™ Online Product Information Tool and Copeland™ Mobile App
Previous Episode: Preventive Maintenance