Revised from an earlier post. Read the original here.
Before you know it, summer will be here in full swing – high temperatures and sunny skies! After the long winter season you may feel ready for the summer heat, but is your AC unit prepared to keep your home cool? It is important to ensure your system is prepped for summer, and as a homeowner there are some quick tasks you can do to avoid costly maintenance mistakes. After sitting idle through the winter season, your AC unit will need a little TLC before running again. Take these significant yet simple actions before turning your thermostat to cooling this season, and your home will be all set for summer.
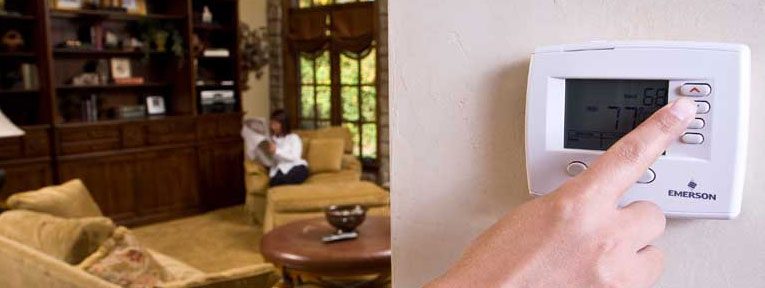
Spring HVAC Startup Checklist: Here are eight important things to check BEFORE switching the wall thermostat to cooling.
First, start with the outdoor unit:
- Remove any condenser covers, coil blankets or lids: If you covered the outdoor coil in order to protect it during the winter months, be sure to remove the cover before starting the system. These covers protect and keep leaves out of your unit, but also limit air flow and any heat transfer. Starting the system with any of these covers in place, even for a short time, could severely damage your system. Many people forget to remove their covers every year, often resulting in major repairs or even replacement of the whole system.
- Inspect the outdoor unit panels: These panels are designed to enclose the electrical connections and must be in place to help protect both you and your system. If you are missing a panel (possibly due to wind) or if the panel is misaligned, this could pose safety risks for both you and the safe operation of the equipment. If the panel covering the electrical connections is missing or out of place, you should call a qualified technician for an assessment before starting your system.
- Remove any debris from the outdoor coil: Depending on where you live or what side of the house your system is located, you might find trash or vegetation blown into or against the coil. The system coils are designed to transfer heat; any debris limits this effect. To get the best possible performance from your system, remove this debris from the coil and surrounding area. If there is a lot of dust, pollen and debris in the coils you can usually wash this off with a garden hose, but be sure to keep the spray limited to the coil area and keep it away from any electrical panels. Also, while mulching in the spring, take care to not pack mulch around the base of the unit. This is especially true for heat pumps as there’s likely a space under the unit and this should always be kept open to allow good air flow to the outdoor unit.
- Repair or replace any damaged pipe insulation: There are two refrigerant lines running from your outdoor unit to the indoor air handler – a small one and a larger one. The suction line is the larger copper pipe on the outdoor unit and this line brings the cool refrigerant back to the compressor in the outdoor unit. If the larger suction line has damaged insulation, this could cause a loss of cooling for the outdoor unit which could damage your system and may also cause energy use. Damage to the foam insulation can be caused by sun rot, freezing water trapped in the foam or winter animals looking for shelter or food. The insulation should be in place to maintain proper system cooling. If the insulation needs replacing, do so before starting the unit. Look on the copper pipe for a size (5/8, 3/4, 7/8, etc.) to determine the proper size for your replacement insulation. It might be possible to find the insulation at a local hardware store. When installing this insulation be careful not to bend or pull on either of the lines as this might cause the lines to crimp or to develop a crack which would result in refrigerant leak. (NOTE: ONLY the larger line needs insulation. The smaller copper line does not require insulation.)
Then, inspect the indoor unit:
- Change the air filters: The change in seasons is usually a good time to replace your indoor air filters. According to the U.S. Department of Energy, the most important maintenance task that will ensure the efficiency of your air conditioner is to routinely replace or clean its filters. With the normal airflow obstructed, air that bypasses the filter may carry dirt directly into the evaporator coil and impair the coil’s heat-absorbing capacity. Replacing a dirty, clogged filter with a clean one can lower your air conditioner’s energy consumption by as much as 5% to 15%. You can find most common replacement filters at your local hardware store but you will need to know the size and model number of your current filter to make sure you get the right one. If it is too large or too small it will not work well and this could also harm your system. Filters have a “MERV” rating. Developed by ASHRAE, the Minimum Efficiency Reporting Value (MERV) rates filter performance on a scale of 1 to 16. The higher the MERV value the more efficient the filter is at trapping airborne particles. For example, a MERV7 filter is a good common rating for the common 1” size range.
How to change your indoor air filter:
- Check the coil “condensate” drain: This drain, which is usually plastic, is located on the indoor air handler and is used to remove the moisture collected from the humid air in your home while the air conditioner is running. Since the coil’s temperature is lower than the ambient air, water from the air will condense on the coil and drip into the tray below. This condensed water needs to flow to a drain or the tray will fill up and flood the unit or potentially spill water out below your indoor unit and into your home which could cause a costly mess in a finished area. Check to make sure the line is in the proper place and has not been bumped or broken over the winter months. Inspect it to see that it will drain to the appropriate location. After start up, on a hot, humid day when your AC has been running a lot, it is a good idea to check this line again to make sure it is draining properly and not leaking.
- Clean the supply vents and return grills: Make sure that all supply/return air grills and vents are open and free of debris. It would also be good to use the vacuum to remove any pet hair or dust that might have accumulated during the previous season along with any obstructions which restrict proper air flow to and from your air handler. Some houses have separate winter and summer supply vents, or house zoning, and some even have separate systems – one for heating and one for cooling. If you have a system like this you might have put extra plastic material over the AC vents to prevent drafts during the colder season and through winter. If so, it is important to remove these before you turn on the AC or you will not have proper air flow back through the system and this could cause severe damage. In general, cleaning all vents at the beginning of every season is a good idea.
- Turn it on and make sure it works: After going through the checklist, wait for a nice, hot day when you have some time to spare. Turn the system on and check to make sure you have cool air coming out of the indoor vents for the first few minutes after starting it, and then every few hours throughout the day. After the first few minutes, you should feel cool air coming out of the registers. If no air is coming out (or if the air coming out does not feel cool), then something might be wrong and you should immediately turn the system off at the thermostat. You can go through the checklist one more time and then try it again. If the problem persists, turn the system off and call a good HVAC contractor who can diagnose the problem. Leaving the system turned on when it’s not running properly can do a lot of damage. It never hurts to ask a HVAC professional to help diagnose the problems if your system is not working properly.
In summary, a brief inspection of your system now could help keep your system running worry free through the heat of the summer and fall and is especially important for older systems. While performing this general inspection, take note of the overall system health in order to assess the likelihood of a problem. If your system is old and has endured an unusually harsh season, it might be time to call for help. A qualified technician can help you do a more thorough spring technical inspection to avoid a system failure in the hottest months of the year. The technician can also help address any concerns you have so let the contractor know what you found during your own spring inspection. Summer is just around the corner and no one knows your house better than you. If air conditioning is a necessity due to your lifestyle or geographical location, then be sure to get a professional’s opinion before time runs out.
Download our HVAC spring checklist here.
Check out this great resource for additional maintenance tips when starting your AC unit.
